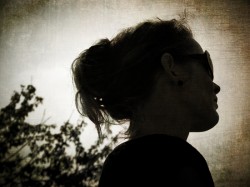
Triptych in Photoshop Tutorial
by Peter Voigt

A Photoshop tutorial for a single image, divided into three panels & adding drop shadows.
Getting started, open your image in Photoshop. Under View verify checkmarks in all the Snap To options.
Follow the steps below to transform your image into a similar triptych to the larger one you see below.
!["Anita" by Peter Voigt [three panels]}](https://www.aamora.com/wp-content/uploads/2011/11/Anita-three-panel.jpg)
PLACE VERTICAL GUIDES
Placing vertical guides at one third and two thirds on the original image
- Select View; New Guide,
- Choose Vertical; enter 33.33% in Position;
- Place a vertical guide at two thirds (entering 66.66% in Position)
SELECT PANEL CONTENT
- Select the Rectangular Marquee Tool (M)
- Decide content of first panel by pointing curser to the upper left corner of the panel & drag out. Keep the mouse depressed while pressing the space bar; move the selection up & to the left, make sure the selection starts precisely at the upper left corner (it is OK to move it a little past the left side of the image and a little above the upper side of the image as the outside of the image will not be selected when the selection is done). Keep the mouse depressed & release the space bar, and continue the selection downwards and to the right, until it snaps to the the first guide and the bottom side of the image. The full first panel for the left side should now be selected.
- Now add a new layer containing the left panel: Right click inside selection; select Layer via Copy. Repeat these steps with the middle & right panels. For each panel, make sure that the background layer is selected before choosing Layer via Copy. (You can remove the guides as we don’t need them anymore: View -> Clear Guides).
LAYING OUT THE PANELS
- De-activate the background layer by clicking on the eye sign to the left of the layer icon. You may also delete it if you don’t want to keep it in the file (but remember to save the resulting file under a new name if you don’t have a copy anywhere else).
- Select the Move Tool (V), select the layer containing the left panel & click somewhere inside the left panel; Hold down the shift key; press the left arrow key 4 times to move the left panel to the left; Select the layer containing the right panel, hold down the shift key and press the right arrow key 4 times. This moves the right panel 40 pixels to the right.
- Since both the left and the right panel have now been moved outside the canvas, we extend the canvas as to show the full width of both panels: Select the menu item Image -> Canvas Size, select pixels in the list to the right of the Width field, make sure that Relative is checked and that Canvas extension color is set to White;
- Enter 80 in the Width field, since we have added a total of 40+40=80 pixels in the width. The full width of the the left and right panels should now be revealed.
- Now, we extend the canvas further, as to put a 40 pixel border around the whole image. Repeat the previous step, but now enter 80 in both the Width field and the Height field (same settings in other fields as before). This expands the canvas a total of 80 pixels vertically and horizontally, adding 40 pixels on each side. (Of course the two previous steps can be combined by calculating the total canvas expansion needed in each direction. This two-step process just makes more sense to me).
- To check that the borders around each picture have the same width, zoom well into the picture, and count the small squares of the opaque background in both the horizontal and vertical borders. Zoom out again.
ADD WHITE BACKGROUND
We’ll now create a white background to frame the panels.
- Select Layer -> New -> Layer… with default settings (Color None, Mode Normal, Opacity 100%). Drag the layer down below the three panel layers. Select Edit -> Fill… and choose White as fill color. Press OK.
- There should now be a nice 40-pixel border around each panel. Of course the same principles as above can be used to make a wider border and/or maybe have an outer border which is wider than the inner spacing between panels.
ADD DROP SHADOWS
We’ll now add a drop shadow around each panel, lifting them off background.
- Select the layer containing the left panel;
- Click fx in the bottom of the layer window and choose Drop Shadow…
- In the pop-up menu that appears; Place a check mark at Drop Shadow
CHOOSE THE FOLLOWING DROP SHADOW PARAMETERS:
Blend Mode: Multiply
Opacity:75%
Angle: 45°
Distance: 10px
Spread:0%
Size: 16px
Noise: 0%
Stroke: Checkmark
Contour:(1st option)
Anti Aliased: No Checkmark
Use Global Light: Checkmark
Layer Knocks Out Drop Shadow: Checkmark
CHOOSE THE FOLLOWING STROKE PARAMETERS:
Size: 4px
Position: Inside
Blend Mode: Normal
Opacity: 100%
Fill Type: Color
Color: Black
In general, make sure there is a checkmark at Preview when you set parameters so you can see the change on the resulting drop shadow as you experiment with different parameters (I mainly experimented with Drop Shadow parameters Angle, Distance, Size, and the Stroke parameter Size).
Now copy the drop shadow settings from the left panel layer to the middle panel layer: Alt-click the fx symbol in the left panel layer and drag it down on the middle panel layer.
Repeat the previous step with the right side layer; A subtle drop shadow will surround each panel.
Your triptych is now done!
*****
Aamora member Peter Voigt is an amateur photographer from Copenhagen, Denmark & our first and only official Doodle-King. View his website, his work on JPG Magazine, circle him on Google + or visit his aamora contributions.
Project Triptych
View the series
